5
detailed Steps to MySQL Uninstallation and ReInstallation on Windows 7
MySQL is a free
database which has been popular since the earlier web era. Its popularity has
gained over the years. Today major platforms are using MySQL as the backend
database. There are several features and capabilities of MySQL which make it
appropriate for most web based applications. MySQL is now owned by Oracle
Corporation. Though this database is good and popular, several users,
especially newbies get stuck with an important issue in MySQL – uninstalling MySQL and installing it back
again. There is a major architecture change that is required in MySQL to
smoothly enable this – but for now, the problems stay. This article explains easy steps – but very
detailed - to uninstall MySQL from a
Windows 7 machine and reinstall it.
Why
is this article required?
·
Scenario 1 - Assume that you have
a MySQL instance on your desktop or laptop. You were doing something knowingly
or unknowingly, and suddenly the application does not connect and you get a
message that there is some problem with your database and you therefore decided
to uninstall the database and reinstall it.
·
Scenario 2 – You wanted to delete the
old instance of MySQL and put a new install
·
Scenario 3 – You wanted to change the
root password of your MySQL You did it, but now the database won’t start and
you need to reinstall
·
You have forgotten the password of your
old MySQL and want to reinstall a new instance
Disclaimer
- This article does not address the issues related to loss of data or backup
concerns. You should have backups of your database regularly.
Importance
of this article in this information age – MySQL stores data
and files in a lot of places. There is also a lack of proper information source
for MySQL problems. Many forums have partial or incorrect answers to this
problems and errors in uninstall and reinstall.
Summary of Steps
·
Step
1
- Uninstall MySQL from your Windows 7 Programs
·
Step
2
- Uninstall MySQL once again using SQL Installer downloadable
·
Step
4
- Reinstall the MySQL
·
Step
3
- Remove MySQL Services and Data
o
Remove MySQL directories
o
Remove MySQL services from Windows 7
o
Release Port held by MySQL
o
Remove MySQL Data including old password
file from hidden directories
·
Step
5
- Create a sample database and get going
(Since the nature of
the problem is peculiar – Step 3 comes after Step 4, deliberately so)
Step
1
– Uninstall MySQL Programs from your
Windows 7
To do this, go to the
following sub steps
Start à
Control Panel à
Programs à
Uninstall a Program
|
Start |
|
|

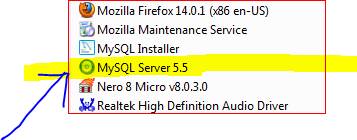
·
You will MySQL listed there (like MySQL
Server 5.5, MySQL Server 5.1 etc)
·
Click on the particular Program
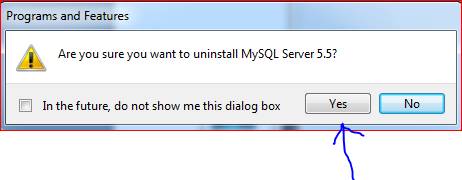
·
It gives a dialog box “Are you sure you
want to uninstall MySQL Server 5.5”.
·
I am assuming that you know what you are
doing. So click “Yes”
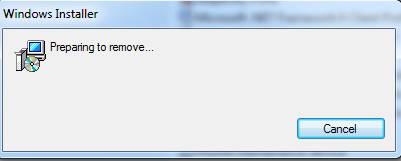
·
Once you say “Yes”. It will give you the
following dialog box
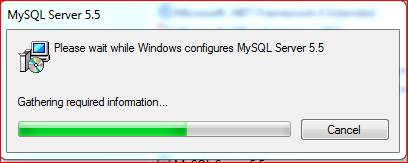
·
On some machines the next dialog box
maybe a permission dialog. Click “Yes” again here
·
Next you will see the following dialog boxes
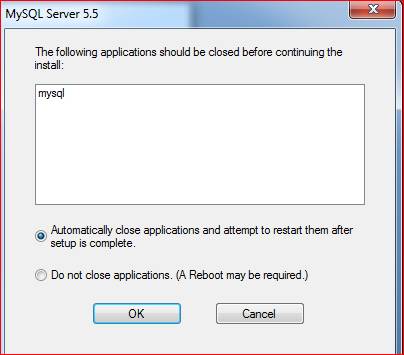
·
On the above box select “mysql”. If you
are using MySQL for standard use, these radio buttons don’t matter.. Click on
the first one. This is where I mean – MySQL needs to be re designed with proper
architecture and documentation - since
the language on the radio buttons doesn’t make sense. Anyway – click on the
first radio button and say “OK”
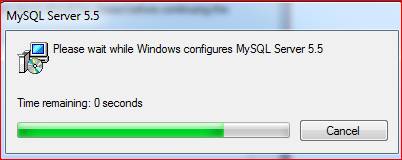
·
Next you get the following dialog box
and then your MySQL has been uninstalled (but not completely).
Step
2 – Uninstall MySQL through the MySQL installer
This process seems to be redundant after Step 1. But
sometimes it has been observed that this is complementary or mandatory.
Therefore it is advisable to do this step. This step is also required if your
reinstallation has halted due to some reasons and you have to remove the
vestiges.
To do this – you need to have the MySQL installable
(download). This is also going to be needed at Step 3. You can get the MySQL
downloadable from MySQL site or from popular download sites. There are two
types of files for Windows 7. The smaller file is an exe file which is
approximately 5MB. The larger file is a complete installer of 200MB. Having the
smaller file should be good enough for the install. But if you want additional
tools and wizards, you could use the larger file. Also the larger file requires
.NET 4.0 to run. So you may have to install .NET from Microsoft site and then
use the larger file. Since smaller file is good enough, this step explains the
process using the smaller executable file. I have downloaded the file and it
shows as below. 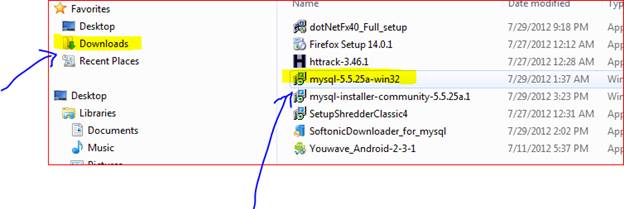
·
I double click on the file
“mysql-5.525a-win32”
·
I get the first dialog box and click
·
Click Next and you get another dialog
box
·
Click “remove”. You will get another
dialog box

·
Click “remove” and it does the removal
process. If for some reason the system does not proceed, check the bottom part
of your screen, as it should be waiting for your permission “Do you want…..”.
Click “yes”. If the removal process is done, you will get the following screen
Step
3 – Remove Data Files and Services and Release the Port
Step 1 and Step 2 removes MySQL from a program
perspective, but does not completely remove MySQL.
·
Does not remove the MySQL directories associated with the application
·
Does not remove the MySQL Service from windows
·
Does not release the Port which was being used by MySQL
(normally port 3306)
·
Does not remove your login data. This login data is your
earlier id and password.
So Step 3 addresses all
these points. Many users have asked for these steps because of multiple
reasons. Especially if you have lost your password. But before we go to Step 3,
let us try reinstalling the MySQL without doing Step 3. That means – let us go
to Step 4 and see what happens. If everything goes fine, then you don’t
need this Step 3….Step 3 is described after Step 4 for easier
follow-up.
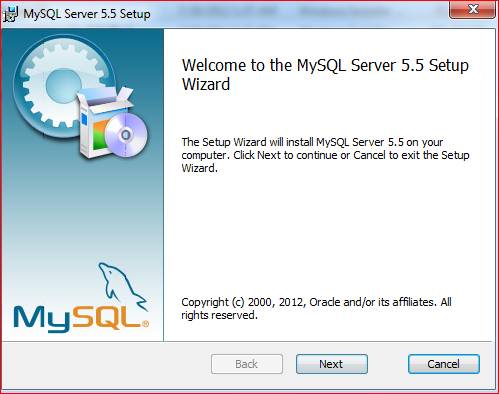
Step
4 – Reinstalling MySQL
·
Get a download of MySQL as explained in
Step 2
·
I double click on the file
“mysql-5.525a-win32”
·
I get the first dialog box and click
·
Click “Next”. You will get a license
agreement
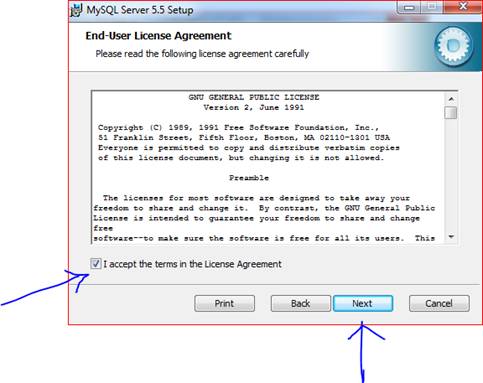
·
Click on checkbox “I accept…” and click
“Next”
·
It gives the next dialog box to select
the type of installation
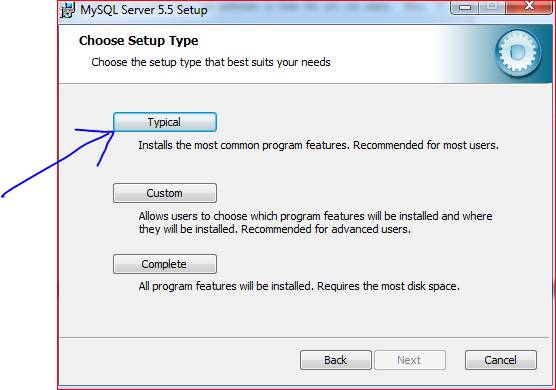
·
Here you can click “Typical” - for all
normal users a typical setup is good enough
·
You will get the next dialog box
·
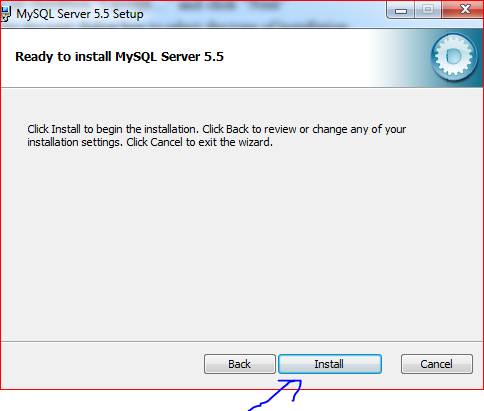
Click “Install”. As you can see the
number of dialog boxes are one too many. You will see many more before the
final step is completed
·
You will get the next dialog box
·
If your computer is taking too long,
just observe your bottom most part of your screen – it may be asking for
permission to proceed “Do you want the following program…..”. In that case
click “Yes”
·
Next you will see the following dialog
boxes. These are again junk dialog boxes and could have been avoided. . Click
Next on these two
·
You will see the following dialog box
·
Don’t
say “phew finally”. This is not the end of the
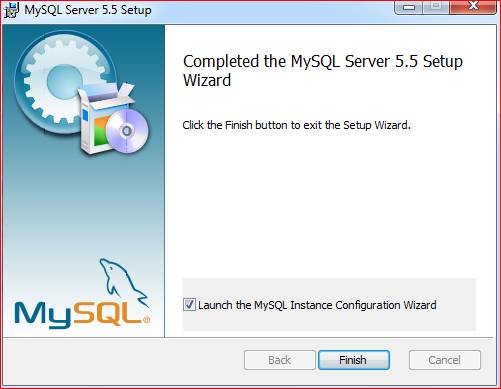
installation. There is lots more. But click “Finish” here.
·
It will launch the server installation
configuration screen (dialog box) as follows (for some machines, if it is taking
too long, just check your bottom screen, it may be asking for permission to
proceed. Click “Yes”)
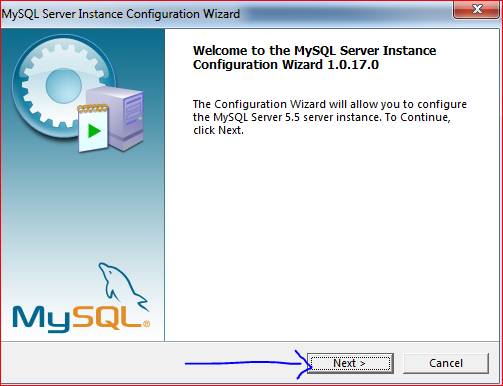
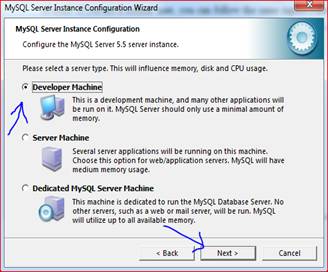
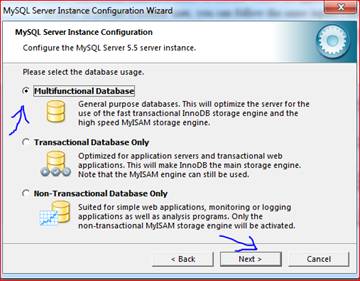
·
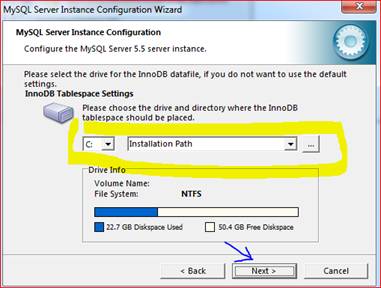
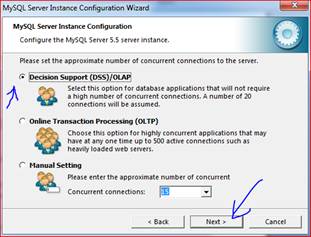
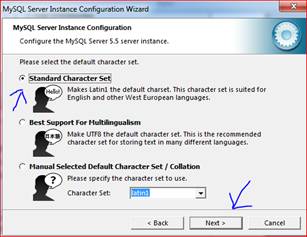
Now – this screen leads to a series of
screens where the application asks you to input a lot of stuff. If you are a
normal user, you can follow the same inputs I have done.
|
|
|

|
|
|
|
|
|
·
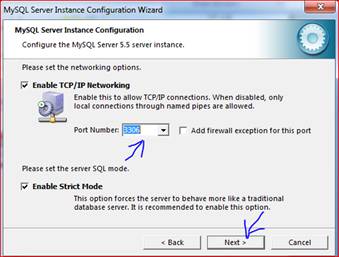
If you get an error message “Port 3306
is already in use by another MySQL instance…”, then you have to cancel this
step. Go to Step 3. Finish everything mentioned there and come back to Step 4.
Do not put another port number like 3307 and proceed.
|
|
|
·
Now the last screen comes up
·
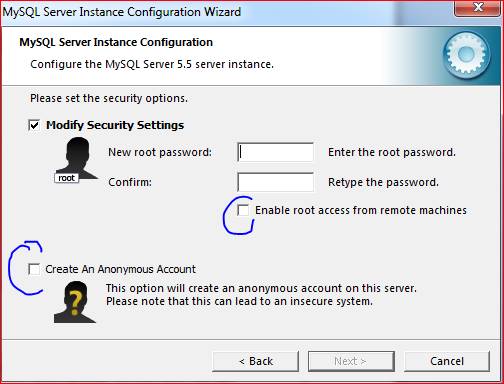
Here – you have to put in your password.
Note – that the user id is always “root” (you don’t have to enter the user
id).. You need to only key in your password.
·
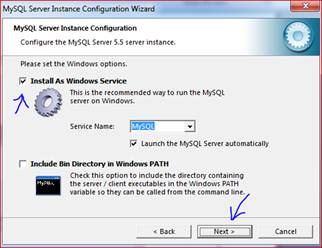
The options circled in blue are not
required for normal users, so can be left unchecked
·
After you enter the passwords – the
“Next” button shows up. Click on that and you get the last screen
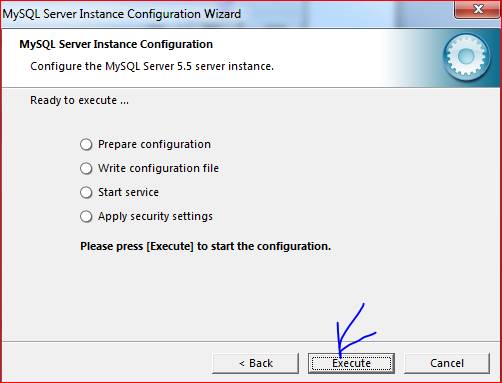
·
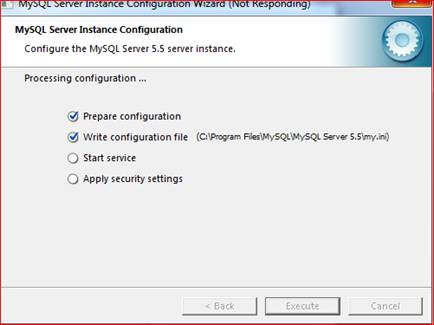
Press “Execute” here. It goes on the
above radio buttons one by one. It will take a while for this screen to get
completed, with multiple status points. At any point of time you click the
install screen, you will get “Not responding”. But don’t worry, the work is
going on behind the scene. As said – this takes a while, so have patience
·
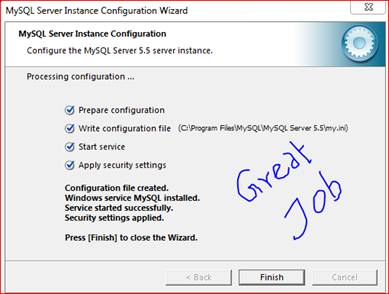
If all goes well – you should see the
following screen
·
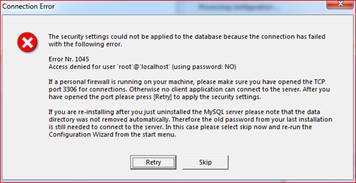
If you see the following error, then you
have two options
o
If you have really forgotten the
password and don’t know the old password – you need to press “Cancel”. You then
need to do Step 3 completely and then come back to Step 4. There is no other
way
o
If you have entered a wrong password,
then you can say “Skip” and then you get the following screen. Press “Back” a
few times until you get the password screen. Input the right password (the old
passwords and you should get the installation through. If you still get the
“Retry Skip” screen, then you HAVE to do Step 3 and then back to Step 4 again
|
|
|
|
|
|
|
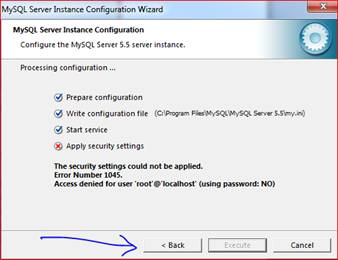
One
more important matter in Step 4 – At any point of time, if by some mistake,
you have pressed cancel or your installation has halted, you cannot redo Step
4. You will get the below error message. You have to do Step 3 and then come
back to do Step 4 |
|
|
|
|

Step
3 – Uninstalling MySQL Data and Services Completely and Releasing Port
·
Removes the MySQL directories associated with the application
·
Remove the MySQL Service from windows
·
Releases the Port which was being used by MySQL (normally port 3306)
·
Removes
login data (your earlier
password)
To do this Step 3, the following sub steps need to
be done
·
Remove MySQL Files and directories
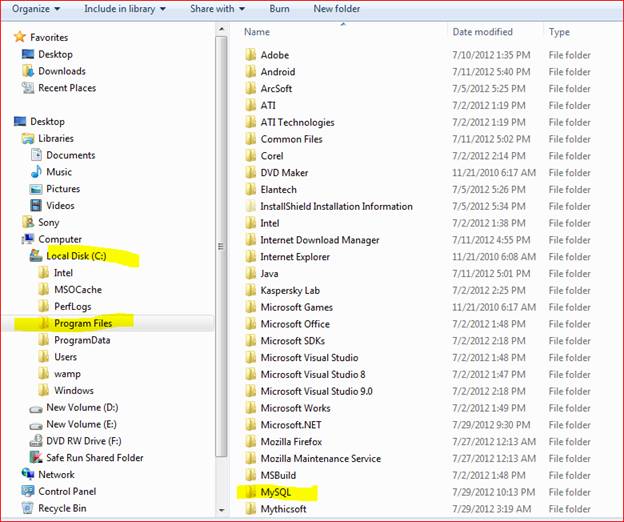
o
This process is simple. Just locate your
c:\Programs directory. It could be
either “C:\Program Files” or “C:\Program Files (x86)”. Locate the folder called
MySQL and delete all the files in this folder.
·
Remove MySQL Service and release your
port 3306
o
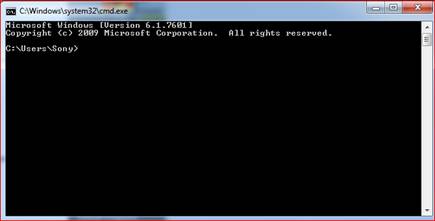
To do this – go to command prompt on
your windows
·
Type “cmd” and press “enter”. You will
get a black screen which shows the command prompt
·
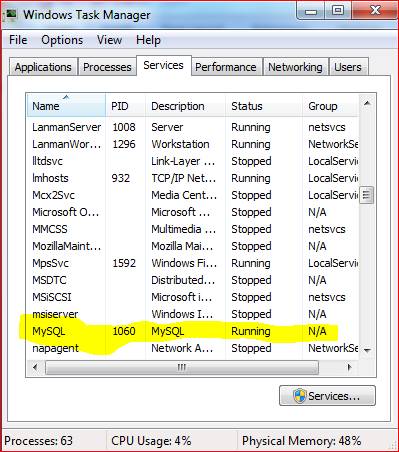
Now you need to find the name of your
service. To do this, press “Ctrl Alt Del” and click on “Start Task Manager”,
which opens up your task manager. Click on “services”. You will see mySQL
service as follows
·
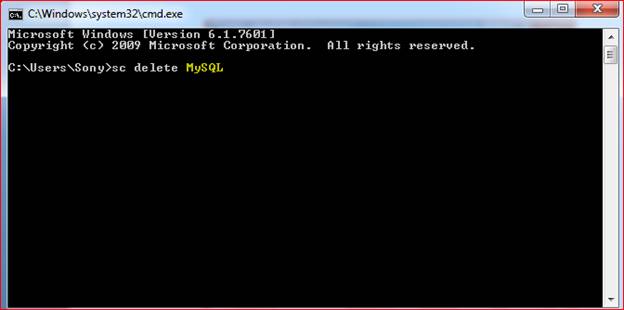
Go back to the black command prompt
screen and type the following and press enter r “sc delete mysql” (without
quotes). The name “mysql” should match
the same as what you are seeing in the services screen above. In my case
it is “MySQL”. Sometimes it may show up as “MySQL51” etc. So be sure you use
the correct name.
·
If you have access it should delete and
show you a success message. If it
shows “Access Denied”, then you have two options
o
If you are really not the admin of the
computer, nothing you can do. You have to wait for the admin person to login
and remove this service. NOTHING can be done.
o
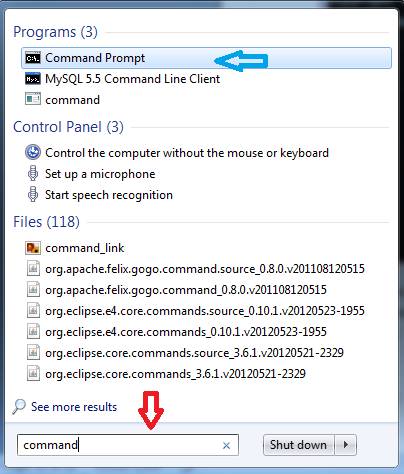
If you are the admin owner of the
computer, then open up the command prompt using the admin option as follows
§ Type
“command” in the start bar search form. You will see I have marked two arrows –
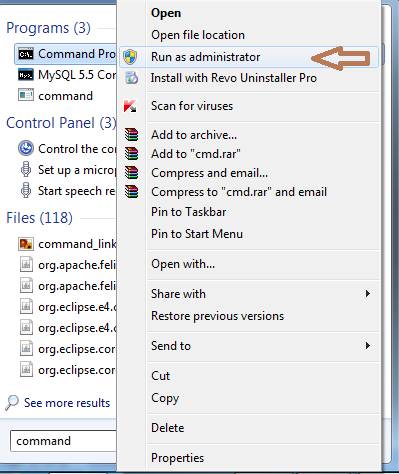
red and blue. Place your mouse on the blue arrow and right click.
·
Then select “Run as Administrator” (show
in brown arrow). The command window will open up with you as Administrator
·
Go back to typing “sc delete mysql”. If
you are really the administrator, you will get a success message as follows
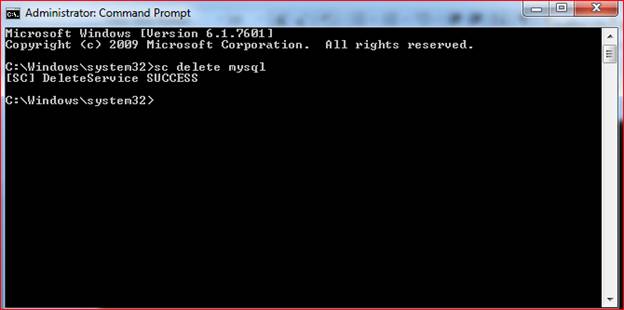
·
So you have now removed the MySQL from
Windows services and released the port which it was using
·
Next sub step is to remove the login
data and other data files. For this you need to know a few things
o
On Windows 7, MySQL stores its data in a
folder called “Program Data”. You normally won’t find it through explorer, as
this is a hidden directory. So you have to do a few steps to locate this
directory
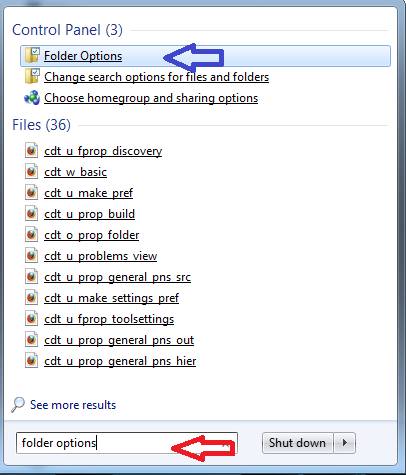
o
Go to search option on your windows
taskbar and type “Folder Options” as show in RED arrow. You will get a folder
option at the top of the box, shown in BLUE arrow
·
Right Mouse Click and Open. You will see
the following
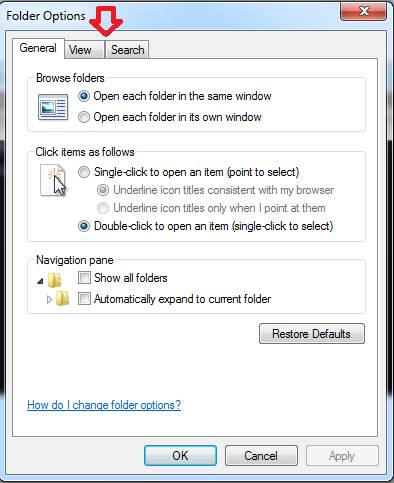
·
Click on “View” as shown in RED arrow,
you will see the following screen
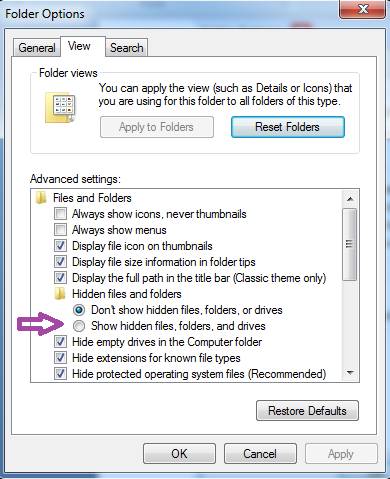
·
Select the Radio button marked in purple
– show all hidden files and folders and then select apply
·
One this is done – on your windows
explorer you will see the program data directory. C:\Program Data.
·
Go to MySQL directory in this Program
Data directory and delete all the files in the MySQL directory.
·
Some users may get a message “access
denied”. Then give permissions and it will delete the files
·
Some users may get a message “Unable to delete
some files because a folder is open..”. In this case, close all windows and try
again. If the problem still persists, then save your work and bookmarks and
restart the machine and try deleting the MySQL folder again. It should work
·
Note
– after everything is over – be sure to hide back the hidden files, as you
don’t want tons and tons of files showing up on your windows explorer.
·
Deleting the Program Data\MySQL files
will certainly remove your previous password data and make the uninstallation
of MySQL as COMPLETE. You have
nothing more left of the old MySQL on your machine.
|
Checklist to
see everything of MySQL has been deleted |
|
Checklist 1 - C:\Program Files should not have a
MySQL directory |
|
Checklist 2 - C:\Program Data (hidden directory) should
not have a MySQL directory |
|
Checklist 3 - Windows Task Manager should not show
MySQL as a process (ctrl alt del, task manager, services) |
|
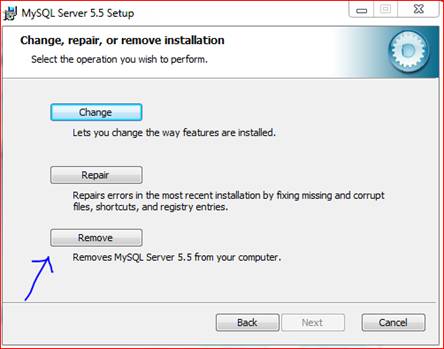
Checklist 4 - When you try installing MySQL from
the download file, it should not go to the “Remove Repair Change” screen, but
should go to the “I Accept Terms..” screen (if you still see the
Remove-Repair screen, then finish Step 3 once again) |
|
Checklist 5 - On Windows Start Panel, you should not
see the following shortcut
|
|
Only if all these 5 checklists have
been done, you can assume that you MySQL has been removed completely from
your system. If not – then redo step 3 all over. The Step 3 can be done
independently many times over until it fulfills the above checklist |
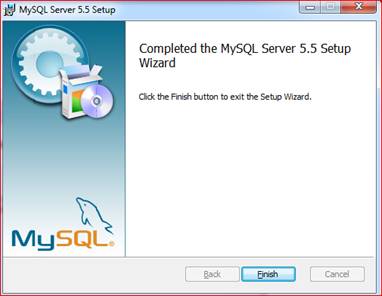
Step 5 – If your above checklist is correct – go
ahead and do Step 4. You should be able to reinstall MySQL successfully. And you
should see the following message at the end of Step 4

Anything goes wrong – redo Step 3, Step2 and Step 4
until you get the right result.
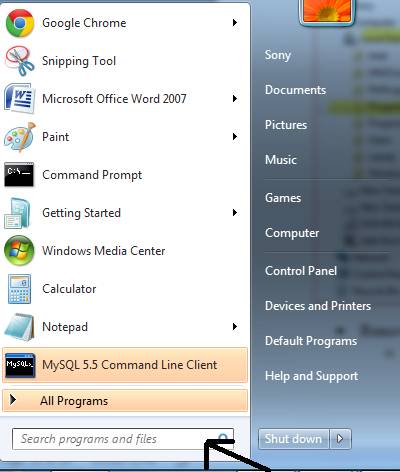
Step 6 – This Step I have mostly created for
everyone to get going. Here we will create a database and ensure that we are
good-to-go. Simple steps – but I have explained in detail, as this is the final
step to freedom and glory.
·
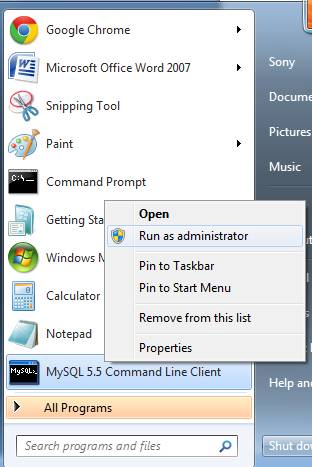
You will notice on your Windows start
screen a shortcut has been created as shown in BLUE arrow.
·
Right Mouse Click on the shortcut and say
Run as Administrator
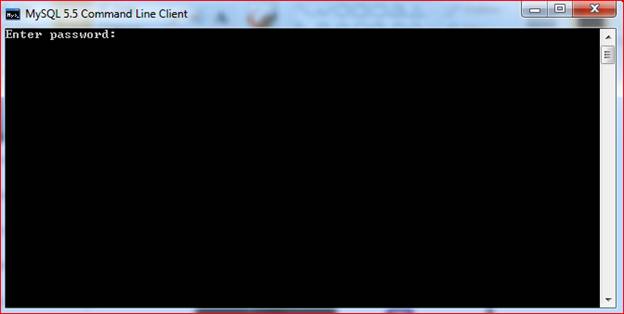
·
You will get a black command prompt
screen of MySQL as follows. Enter your password – the same that you used to
install the MySQL
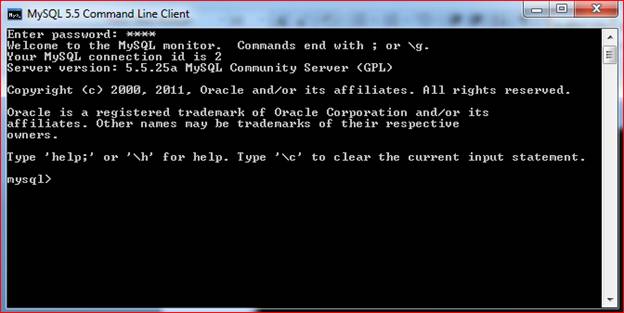
·
You will get the following screen
·
Here you type the following – without
the quotes – “create database magicpot;” and press Enter. The database name is
magicpot. You can put your own database name. You will see a message
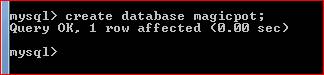
THAT
IS IT
YOUR
MYSQL IS READY TO GO